

First tutorial this month will be on how to paint a Warhammer Fantasy Cold One Knight from the Dark Elves. I'll start with a photo tutorial of the Cold One. After that I'll discuss my techniques used for the Dark Elf and base. I've highlighted the paints and ingredients you'll be needing to finish the job. If you want more pictures on other parts, or if you have more questions, feel free to ask! Enjoy!

This is the unpainted miniature.

Step 1: I started with a mix of Vallejo Green Zinc Chromate, Vallejo Green Blue and Vallejo Glossy Black. Proportions were 2:1:1. I used a normal brush, and made sure I held it a bit flat, to keep the crevices between the scales as dark as possible.

Step 2: Drybrush the basecoat with Vallejo Green Zinc Chromate, already keep in mind where your light will be coming from. I drybrushed it from the top to the bottom.

Step 3: Drybrush the miniature with Citadel Warboss Green, now concentrating on the parts where you want the light to hit the most.

Step 4: Drybrush with Citadel Scorpion Green, only the parts where the light hits.

Step 5: Drybrush the outer edges of your highlighted parts with Citadel Praxeti White. Not too much, just to give the edges a nice highlight.

Step 6: For his belly, I used Citadel Slaanesh Grey. It will look very light at first. Don't let this scare you though. Just apply it with a normal brush.

Step 7: First wash will be Citadel Druchii Violet. It's a purple wash. Apply it from top 'till buttom, making sure it gets into the crevices and puts a dark purple accent at the bottom. After this wash has dried, apply a black wash to put more accent on the bottom parts.

Step 8: After the black wash has dried, you can drybrush the upper parts of these areas with Citadel Slaanes Grey again, to give it its highlights back.

Step 9: Use Vallejo Transparent Green on the border between the upper and lower part of the miniature (the green and purple area) to have a nice transition between the two colours.

Step 10: As a final drybrush highlight you can add some Citadel Praxeti White on the edges of the lower parts.

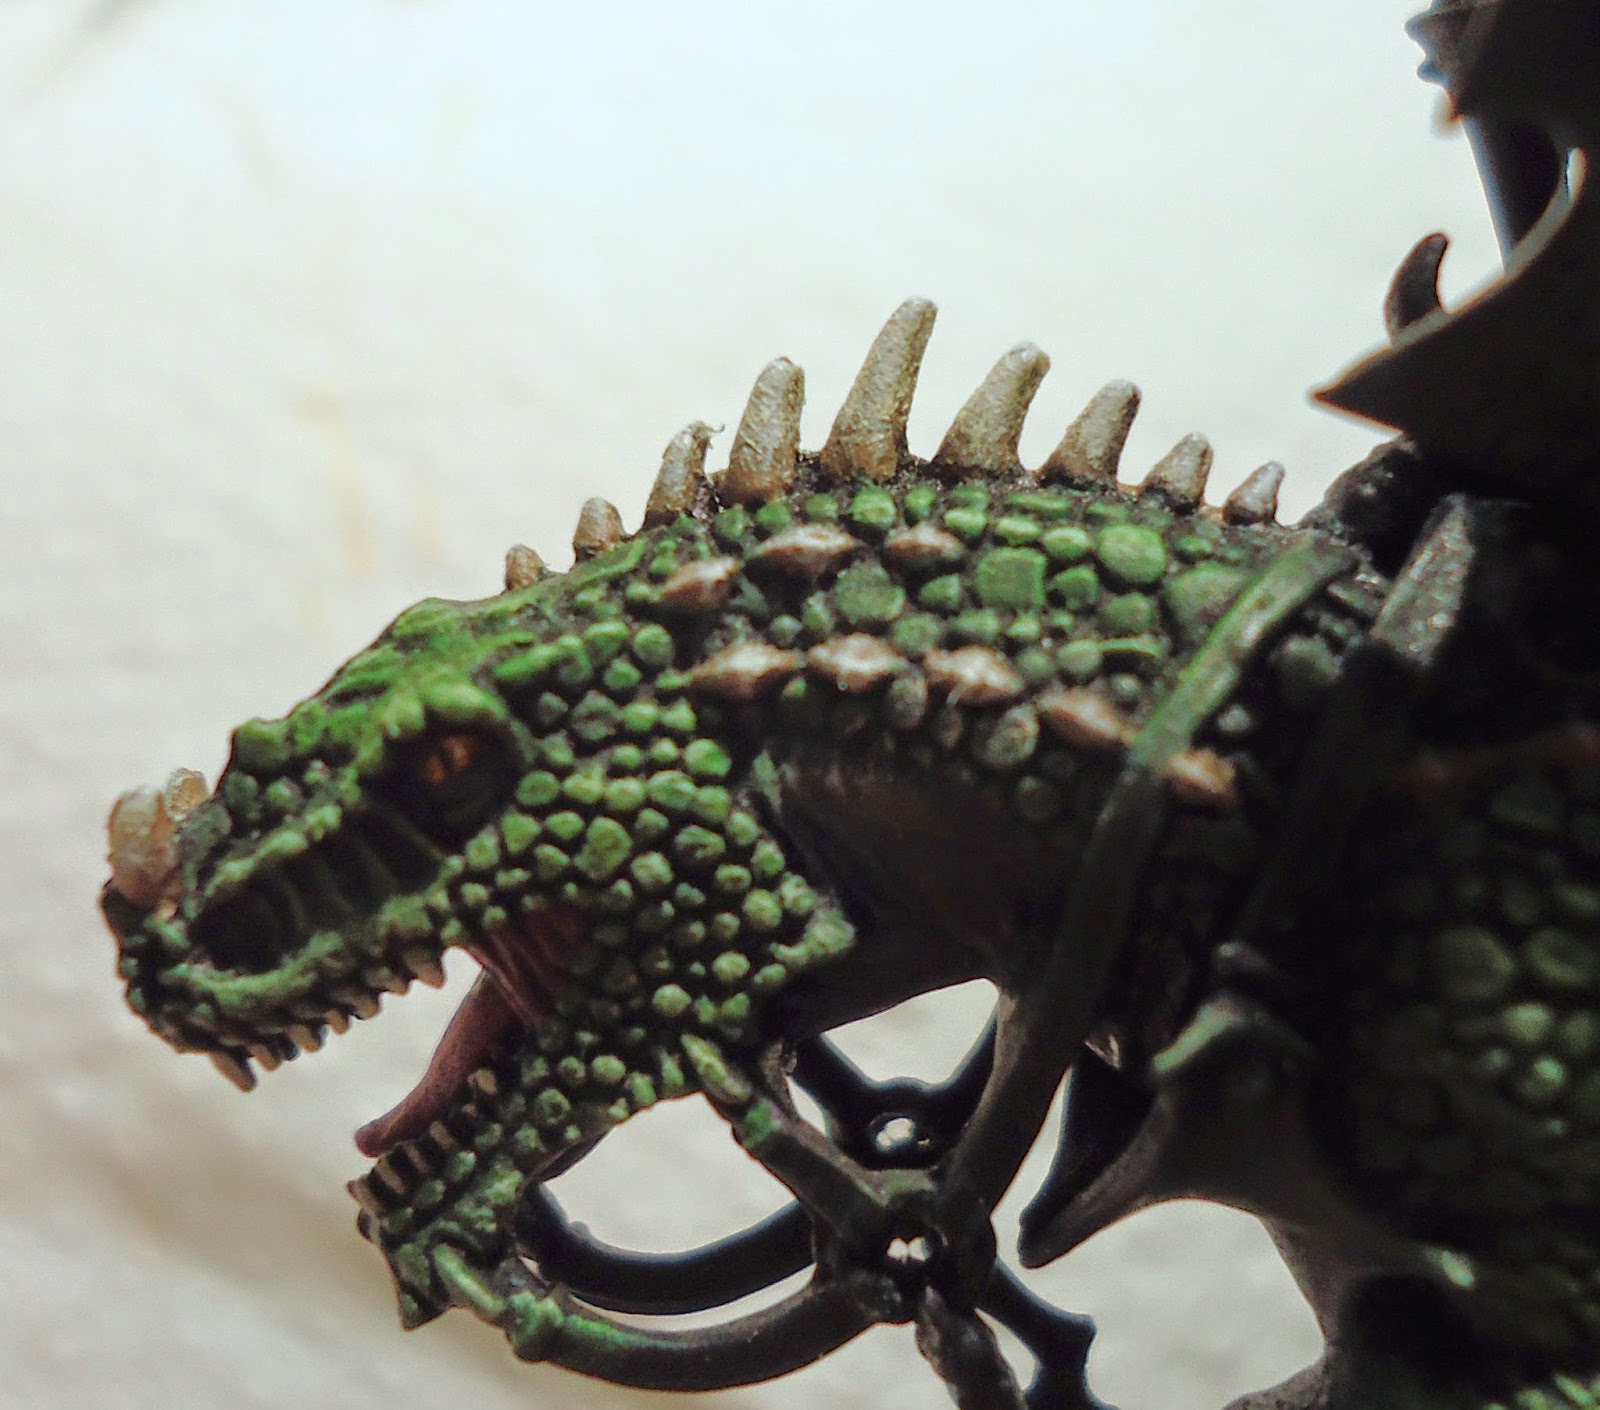
Step 11: For the eyes I used Citadel Averland Sunset. Let it dry, and use a simple black to paint the pupil, and some Vallejo Pure White to give it a shine. Use a bit of watered down black wash to give the upper part a bit of shade.

Step 12: For the claws I used a basecoat of Vallejo German Grey, and a highlight of Vallejo Light Grey. For its mouth I used Citadel Pink Horror, and gave it a Citadel Bloodletter Glaze. Used a black wash on it afterwards to make the details pop out. Teeth were painted with Vallejo Pale White, and were given a Vallejo Brown Wash. I painted the scales on its back in Vallejo German C. Pale Brown.
Step 13: Drybrush the upper scales with Vallejo Pale Sand, give them a Citadel Rhinox Hide wash (you'll have to make this wash yourself using Citadel Rhinox Hide), and drybrush the whole thing afterwards with Praxeti White.
NMM Gold Parts: Black basecoat. From there on all the colours I used were heavily watered down, mixes always 1:1. Started with Citadel Mournfang Brown, building the colour up towards the places where the light hits. Second step is Citadel Mournfang Brown mixed with Citadel Averland Sunset, then Citadel Averland Sunset, Citadel Averland Sunset mixed with Vallejo Flat Yellow, Vallejo Flat Yellow, Vallejo Flat Yellow mixed with White and for the edge highlights in some places I used Pure White. It's always the same method... building your colours up towards where you want your light to hit. Always maken the surfaces you work on smaller and smaller. I will cover this method in a seperate tutorial soon!
Dark Elf armour: For his armour I used the same method as I would do NMM. I started with a simple black, and built my way up to the highlights, using Vallejo German Grey, Citadel Eshin Grey, Vallejo Light Grey and a hightlight of Vallejo Pure White.
Dark Elf Cloak: I began with a mixture of Citadel Xereus Purple and Black as a basecoat. From there on all the colours were watered down. I used the same method as with the armour, using Citadel Xereus Purple, Citadel Liche Purple and Citadel Deamonnette Hide. Went for a Citadel Druchii Violet Wash, and used Citadel Changeling Pink as a highlight.
For all the leather parts I used Citadel Rhinox Hide as a basecoat, Citadel Mournfang Brown as a main highlight and Vallejo German C. Pale Brown as a final highlight.

Base: These are the ingredients I used for the base. I made a mixture of the polyfilla with some of those little stones you use for decoration. Applied it to the base, and put some of the plants in it to give it a bit of life. I've made the stone out of 3 little layers of cork, starting with a big chunk and making the chunks smaller as I went upwards. I've put some of the polyfilla mixture on that too to make it look more smooth. Let it all dry, and gave it a Citadel Rhinox Hide basecoat, a Citadel Bugman's Glow drybrush, followed by a Citadel Eldar Flesh drybrush. For the stone I used Vallejo German Grey as a basecoat and highlighted this with Vallejo Light Grey and Pure White.
I hope I was able to help you guys out with most of it. As said above, if you need more information on this miniature, feel free to ask! Visit https://www.facebook.com/redravonminis to see more of my work and keep in contact!
No comments:
Post a Comment